How to Start PCB Prototyping for Beginners?
Entering the world of PCB prototyping can feel overwhelming. Many beginners struggle with the basics. However, it is a rewarding journey. PCB prototyping allows you to design custom circuits, bringing ideas to life.
When starting with PCB prototyping, focus on the essential tools needed. You will need software for designing layouts. A good soldering kit is crucial. Avoid sophisticated equipment at the beginning. It can complicate the learning process. Keep it simple and manageable.
Mistakes are part of learning. Your first prototypes may not be perfect. You might face issues with connections or layout errors. Reflect on what went wrong. Each error is a step toward improvement. Embrace the trial-and-error approach. PCB prototyping is about practice and persistence. The more you create, the better you will become.
Understanding the Basics of PCB Prototyping for Beginners
PCB prototyping is a crucial first step for many electronics projects. It's not just about creating boards; it’s about understanding them. Beginners often face challenges in grasping the fundamental concepts. According to a recent report by IPC, nearly 60% of new engineers struggle with basic PCB design. This highlights the need for comprehensive learning resources.
Understanding the basics involves more than just technical knowledge. It requires hands-on experience. Beginners should attempt simple projects to familiarize themselves with components like resistors and capacitors. Occasionally, mistakes will occur, such as incorrect soldering. Reflecting on these errors is vital for growth. Many experienced engineers emphasize the value of learning from failures.
The prototyping process can be time-consuming and frustrating. Yet, it's essential for developing strong design skills. Studies show that prototypes can reduce costs by up to 30% in the initial phases of product development. Embracing the iterative nature of prototyping allows beginners to refine their ideas. This constant cycle of testing and improving fosters innovation and deeper understanding. The path may be bumpy, but persistence will pay off.
Essential Tools and Materials for PCB Prototyping
When starting PCB prototyping, having the right tools is crucial. A basic toolkit should include a soldering iron, solder, and wire cutters. These are essentials for assembling your circuit boards. Proper work surfaces and anti-static mats can help prevent damage to components. Many beginners overlook these items, leading to frustrations later on.
Additionally, you’ll need materials like copper-clad boards and etching solutions. Copper-clad boards provide the necessary substrate for your circuits. According to recent industry reports, the global PCB market is expected to reach $74 billion by 2026, reflecting the increasing importance of high-quality materials in prototyping. However, sourcing quality materials can sometimes be challenging. You may find variations in quality and performance across suppliers.
Moreover, software tools are essential for design. Applications for schematic capture and PCB layout can enhance your workflow. Still, it’s important to note that these tools often come with a learning curve. Many beginners struggle to fully utilize their capabilities. Practicing with simpler designs is beneficial before advancing to complex projects. This step may help mitigate the frustration that often accompanies the learning process.
Step-by-Step Guide to Designing Your First PCB
Getting started with PCB prototyping can be exciting yet daunting. Beginners often feel overwhelmed by software, components, and design rules. A simple step-by-step approach can ease that anxiety. First, choose a design software. Many options are available. Use one that suits your skill level. You might feel unsure about which one is right. That’s okay. Experiment and find out what works for you.
Once you have your software, begin by sketching your circuit idea. Keep it simple at first. Focus on essential components like resistors and capacitors. Drawing helps clarify your design. Pay attention to connections. Mistakes happen. It might take a few tries to get it right. You’ll learn more from errors than successes.
Next, transfer your sketch into the software. Create the layout following the design rules. This may feel tedious, but it’s crucial. Check for errors or overlaps in the connections. Test the circuit in simulation mode if possible. This step can save time and frustration. After making adjustments, you're ready to produce your PCB. Always double-check your design before sending it off for fabrication. The details matter, and even small mistakes can lead to big issues. Enjoy the learning process!
PCB Prototyping Time Comparison
This bar chart represents the estimated time in hours spent on different stages of PCB prototyping, including design, fabrication, assembly, and testing. These values can help beginners understand the time commitment for each part of the PCB creation process.
Techniques for Etching and Fabricating PCB Prototypes
Etching and fabricating PCB prototypes can be challenging for beginners. The process usually starts with a design, often created in a software tool. However, mistakes in the design can lead to costly errors. A study by IPC reveals that about 30% of prototypes fail to meet specifications due to initial design flaws. Learning to double-check layouts is essential.
When it comes to etching, using chemicals like ferric chloride is common. This substance removes unwanted copper from the board, revealing the circuit beneath. Many beginners underestimate the necessity for safety gear. Proper ventilation and gloves are crucial. Reports indicate that 15% of hobbyists ignore these safety measures, risking their health.
Fabrication techniques vary in complexity. Some may prefer using a CNC machine, while others might choose manual methods. Each technique has its pros and cons. For instance, manual etching can lead to uneven results. A survey highlights that nearly 25% of DIY enthusiasts encounter issues with alignment and density. Tracking progress and receiving feedback from peers can improve skills significantly.
Testing and Troubleshooting Your PCB Prototype
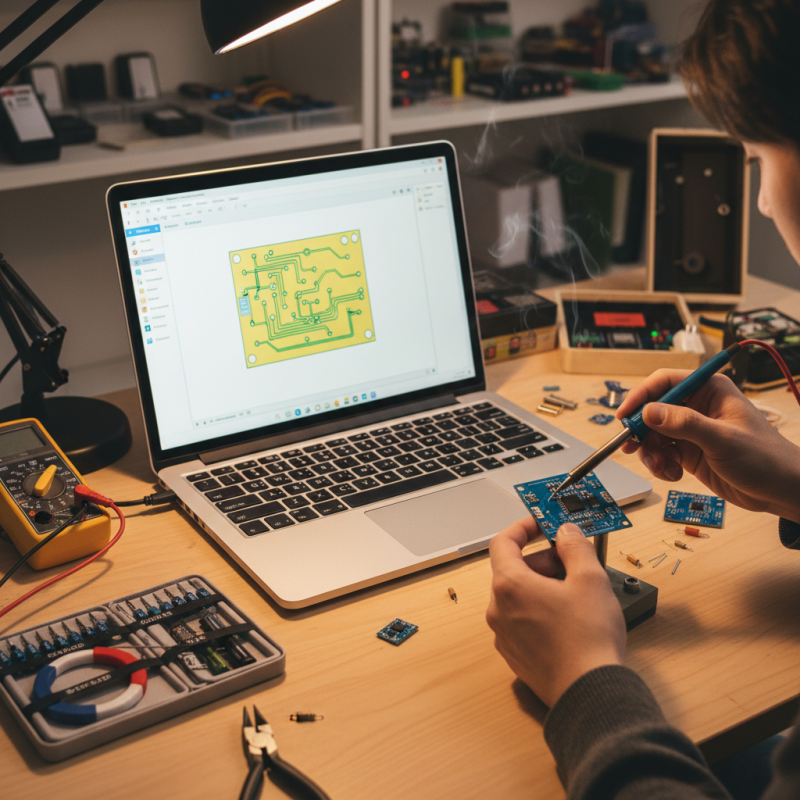
Testing and troubleshooting your PCB prototype is crucial for success. Start by powering up your board carefully. Check for smoke or unusual smells. This could indicate a serious issue. Use a multimeter to measure voltages and connections. If something isn’t right, it’s time to investigate further.
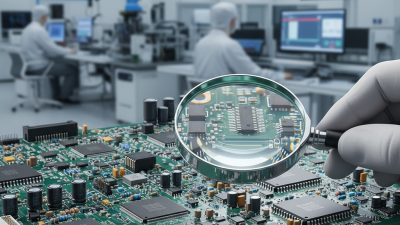
Sometimes, components may not be soldered properly. Take a close look under a magnifying glass. Cold solder joints can cause intermittent issues. Visual inspections can reveal many problems. It’s essential to review your circuit design, too. Compare it against your prototype. Misconnections can lead to unexpected behaviors.
Tips: Before finalizing the design, create a prototype using a breadboard. This allows easier adjustments. Document each step of your testing process. This helps identify recurring issues. Don’t hesitate to go back and revise your design. Every mistake is a chance to learn.
How to Start PCB Prototyping for Beginners? - Testing and Troubleshooting Your PCB Prototype
| Step |
Description |
Tips |
| 1 |
Define your requirements for the PCB prototype. |
Clearly outline the size, shape, and functionality. |
| 2 |
Choose PCB design software. |
Consider free options like KiCAD or paid options like Eagle. |
| 3 |
Create the schematic diagram. |
Ensure all components are correctly connected. |
| 4 |
Design the PCB layout. |
Optimize trace routing to minimize interference. |
| 5 |
Order the PCB prototype. |
Use reputable manufacturers for quality assurance. |
| 6 |
Assemble components on the PCB. |
Follow the schematic carefully during assembly. |
| 7 |
Test the assembled PCB. |
Check for shorts, proper connections, and functionality. |
| 8 |
Troubleshoot any issues found during testing. |
Use a multimeter to diagnose faults. |